Movement - Camera Tool
Updated: 16/03/22
In this section, we will learn how to navigate your way around the 3D Tiny House Designer,move and rotate your view camera.
Top Down Camera
The Top Down Camera is great for designing the Shell and understanding how the design looks as a whole.
This is your standard camera that will be active unless you change to: Fly-Through Camera which we'll explain in more detail later.
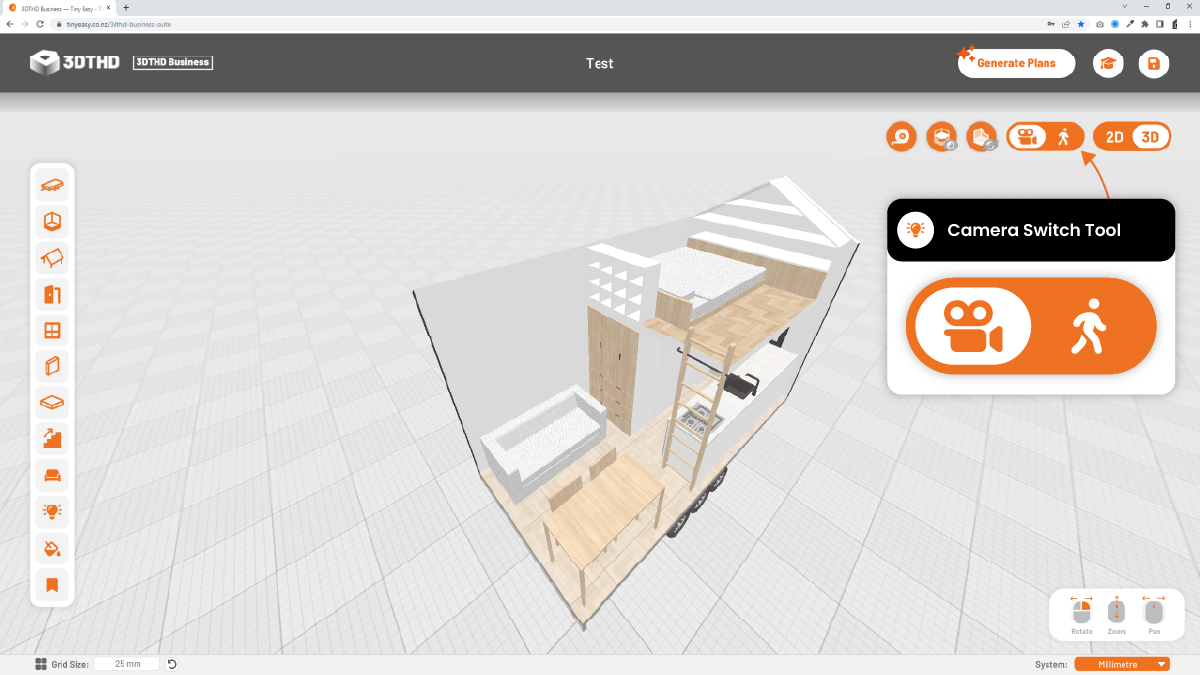
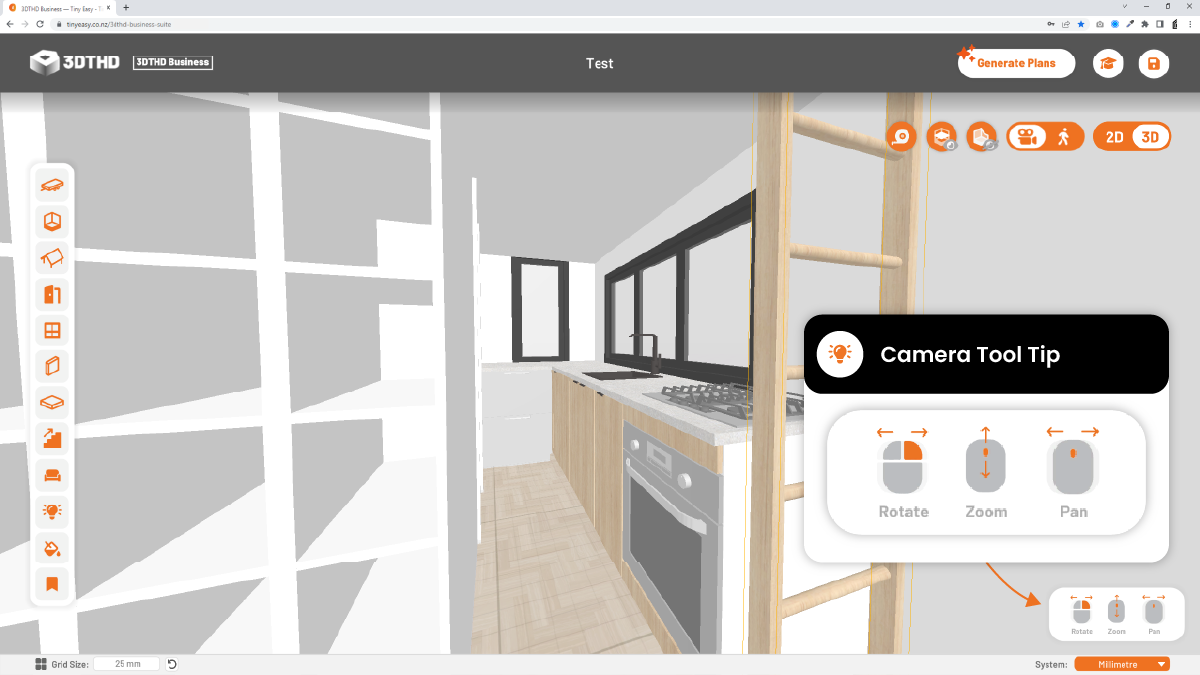
The Top Down camera is your default camera. To see which camera you're in, you can find the camera switch tool in the top right section of your screen. If you're in Top Down, the switch will be highlight the video camera icon.
To use the Top Down Camera:
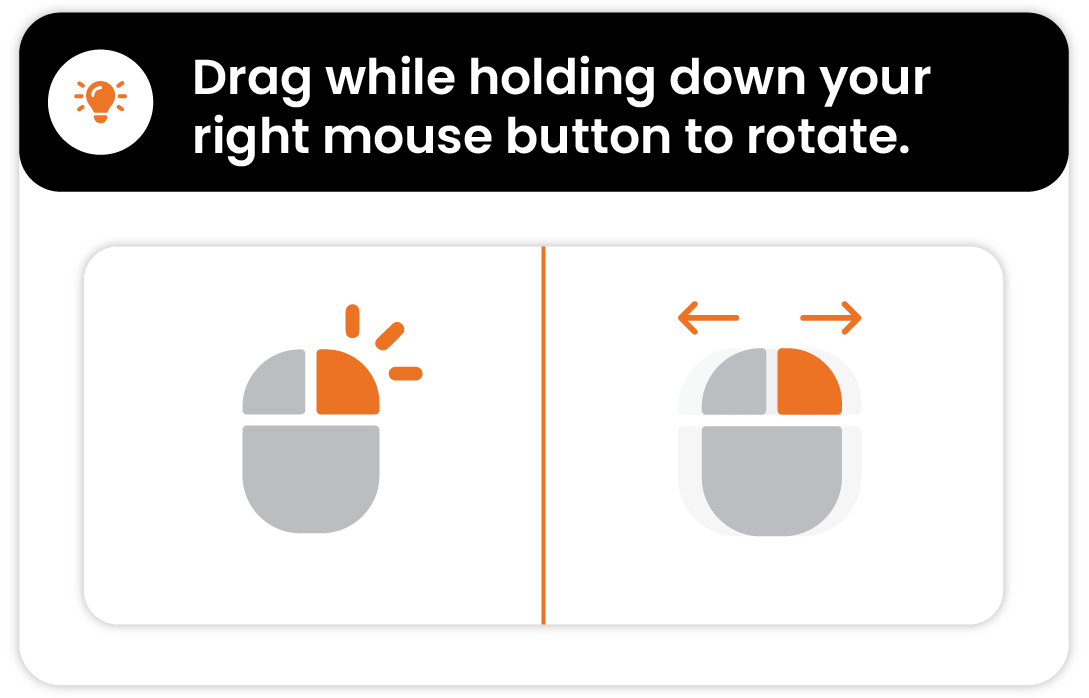
Right-click to rotate around the tiny house
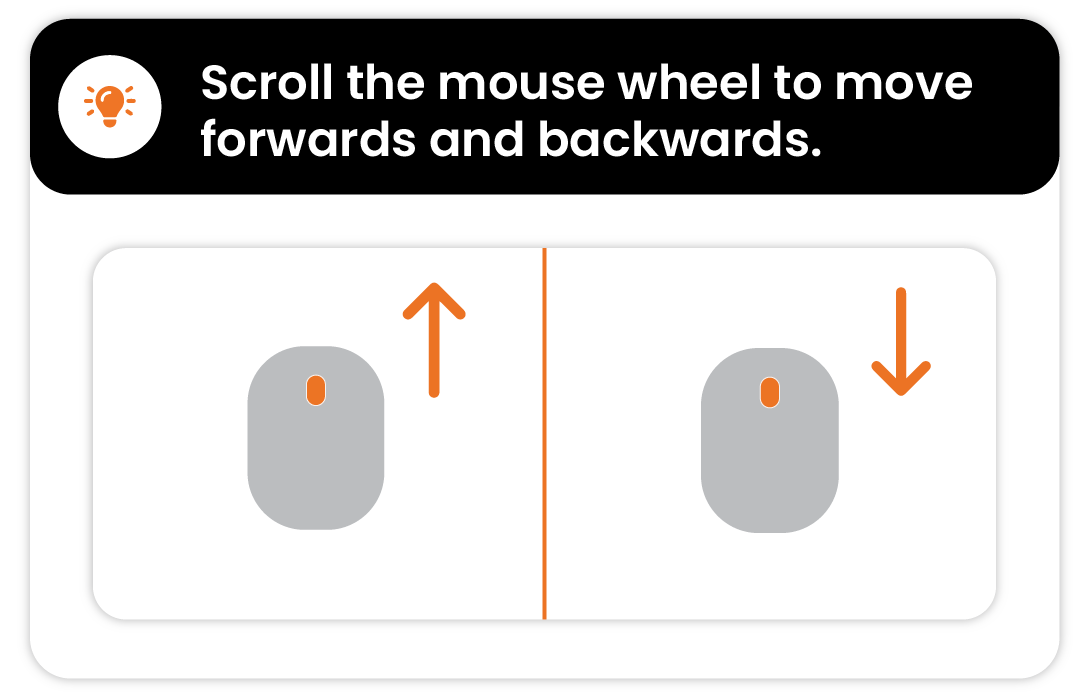
Scroll in and out to zoom.
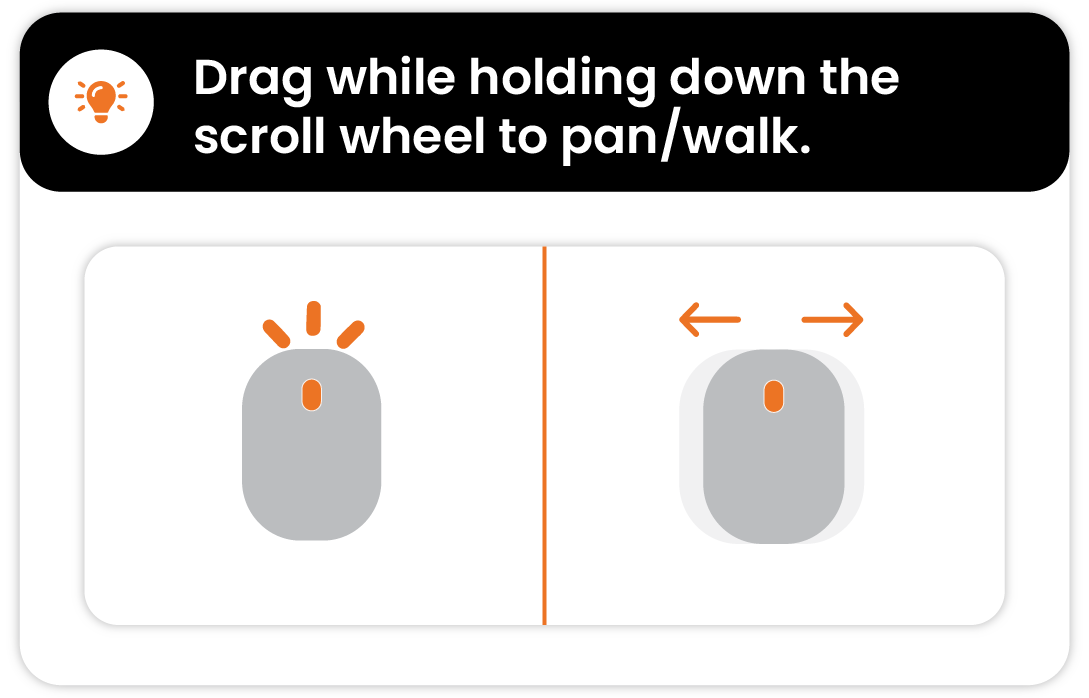
Middle mouse click & hold to pan
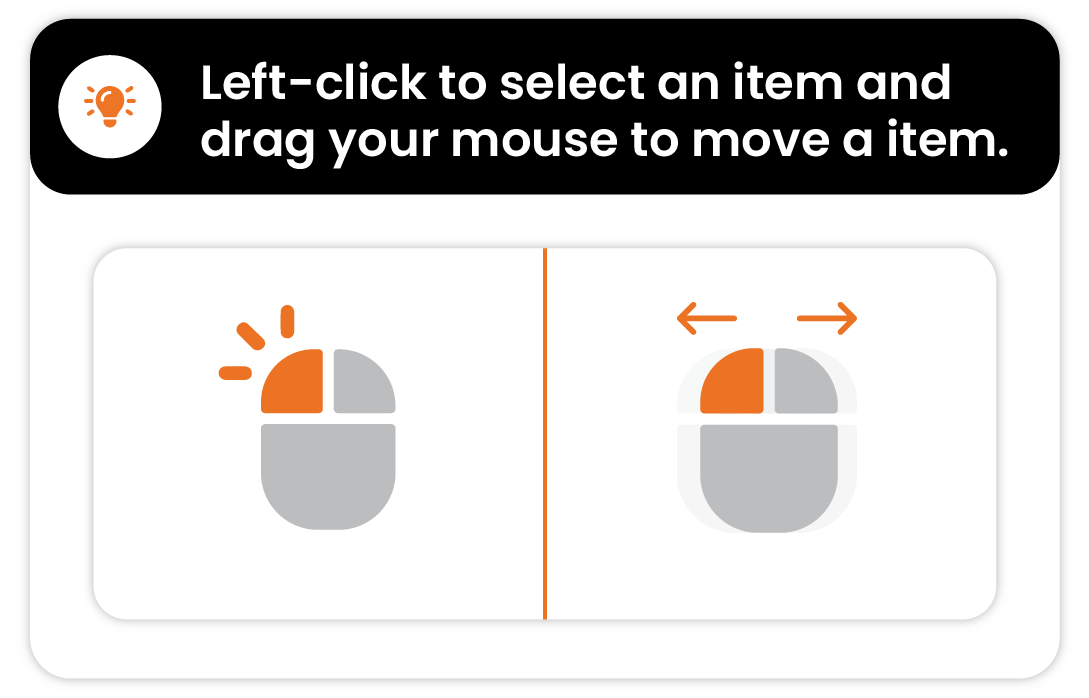
Left-click to select an item
If you get stuck or you can't remember how to use the tool, you can find a camera tool tip at the bottom right of your screen. 😄
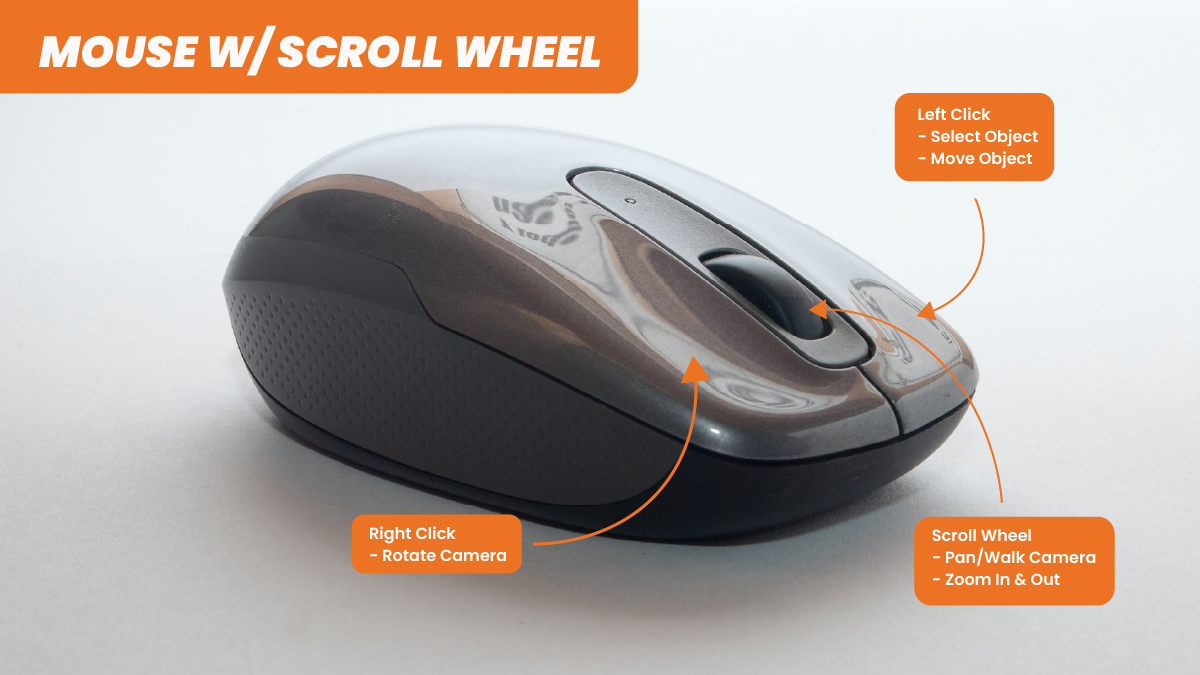
If you're having trouble moving around in the 3DTHD, try using a regular mouse with a scroll wheel.
The buttons on the mouse will help you to zoom in and out.
Otherwise, the Fly-Through Camera is better suited for use without a mouse without a scroll wheel.
An Apple magic mouse does not work as well
Here's an example of a mouse with a scroll wheel:
Fly-Through Camera
The Fly-Through Camera is great for showing how the space looks from an eye-level perspective and designing the tiny house while "standing" in it.
Placing cabinetry and electrical components, especially ceiling lights work great with this camera mode.
To use the Fly-Through Camera:
The Fly-Through Camera allows you to free move through the tiny house as if you were walking though it.
To use the new Fly Through Camera Switch Tool, you can locate the button at the top right of your screen.
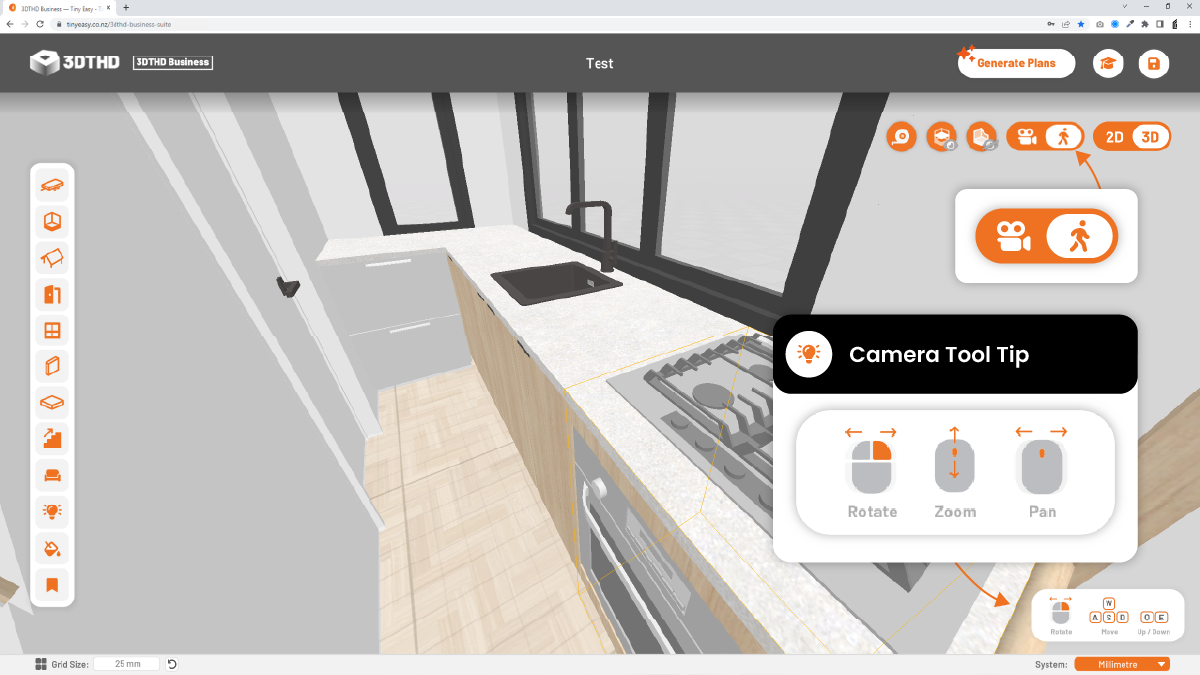
Fly-Through Camera Keyboard Shortcut
If you want a quick access to switch between the cameras, you can also use the C key on your keyboard.
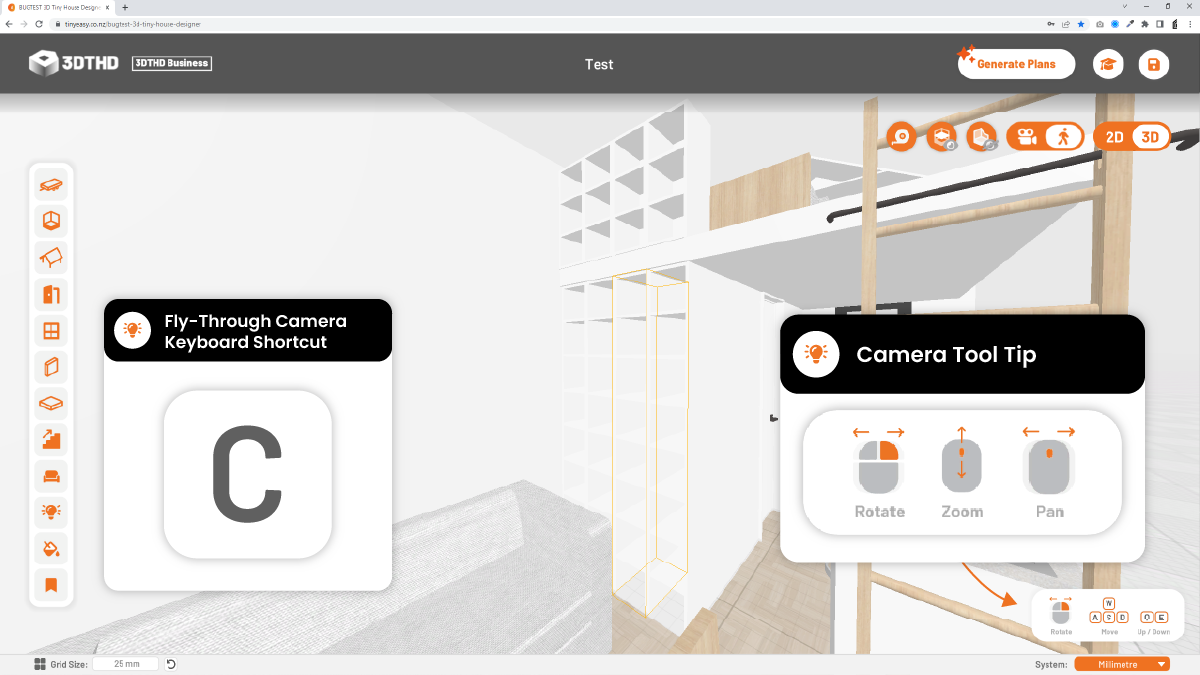
Press C on your keyboard (You don't need to hold this down.)
Right-click and hold to rotate your view
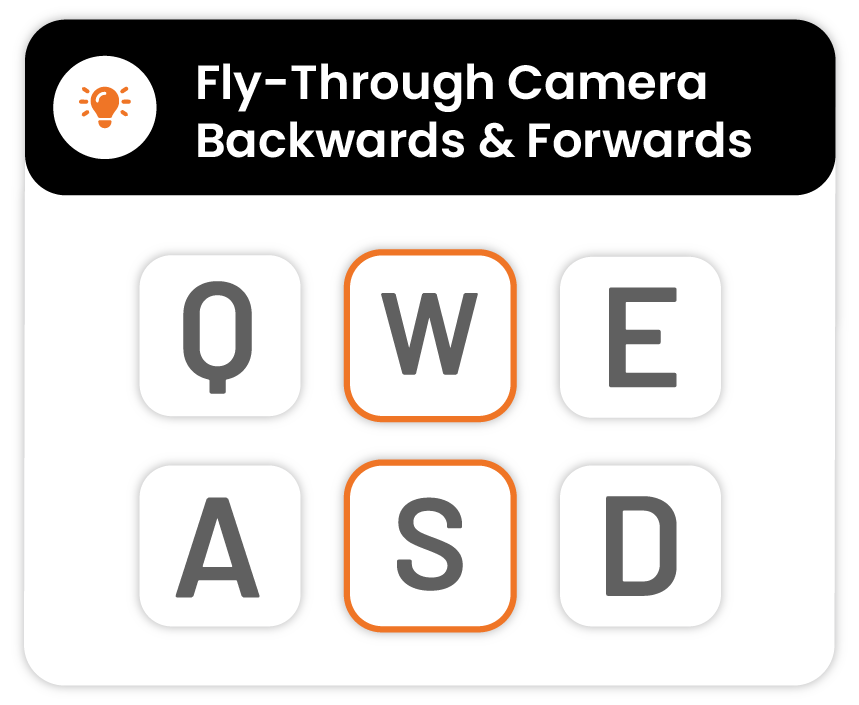
Use W and S to move back and forth. You can also use the up and down arrows on your keyboard.
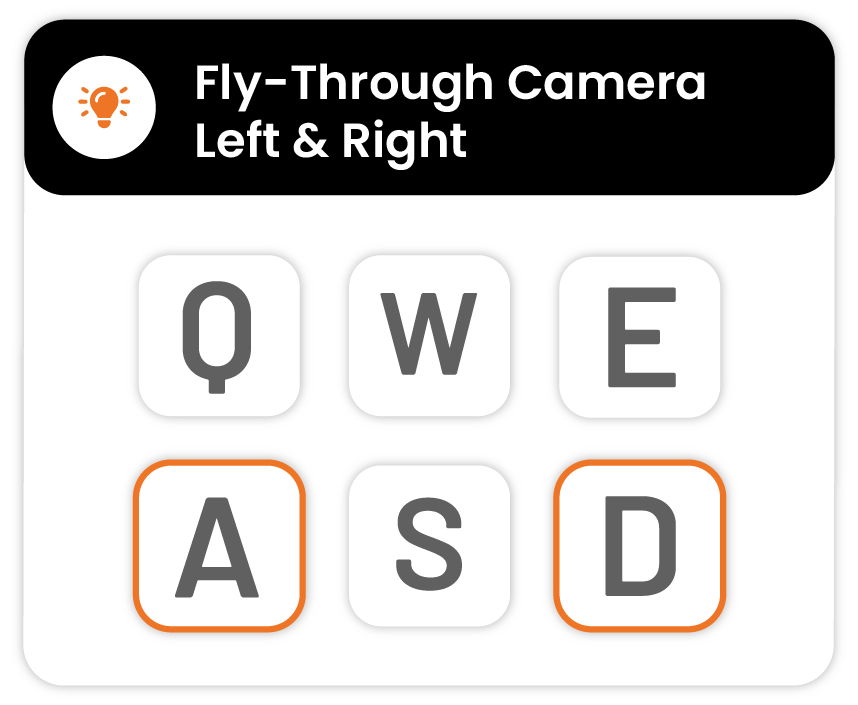
Use A and D to move left and right You can also use the left and right arrows on your keyboard.
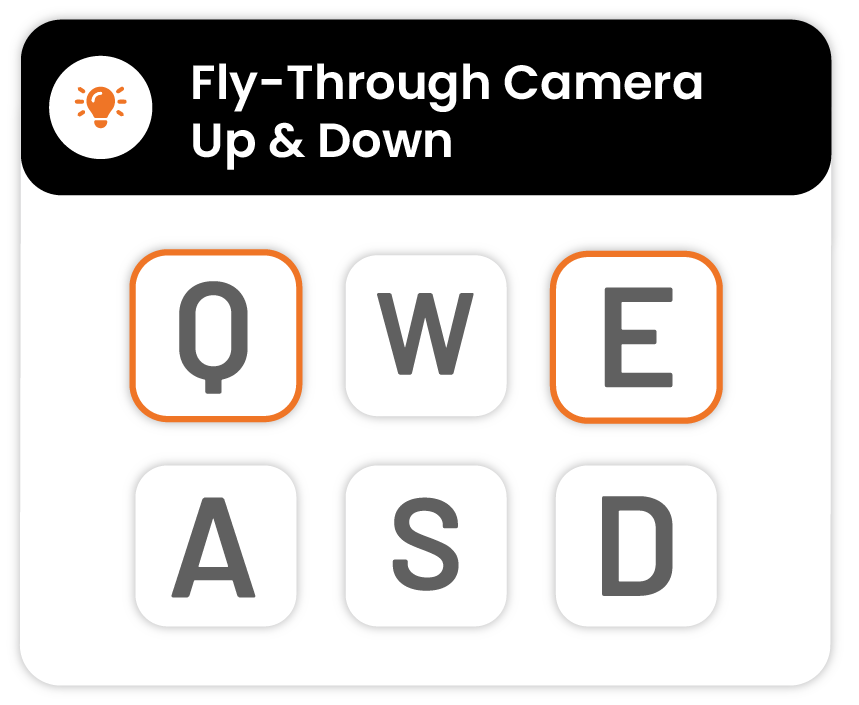
Use Q and E to move up and down You can modify your view by right click while you're moving. This creates a nice "walkthrough" feel.
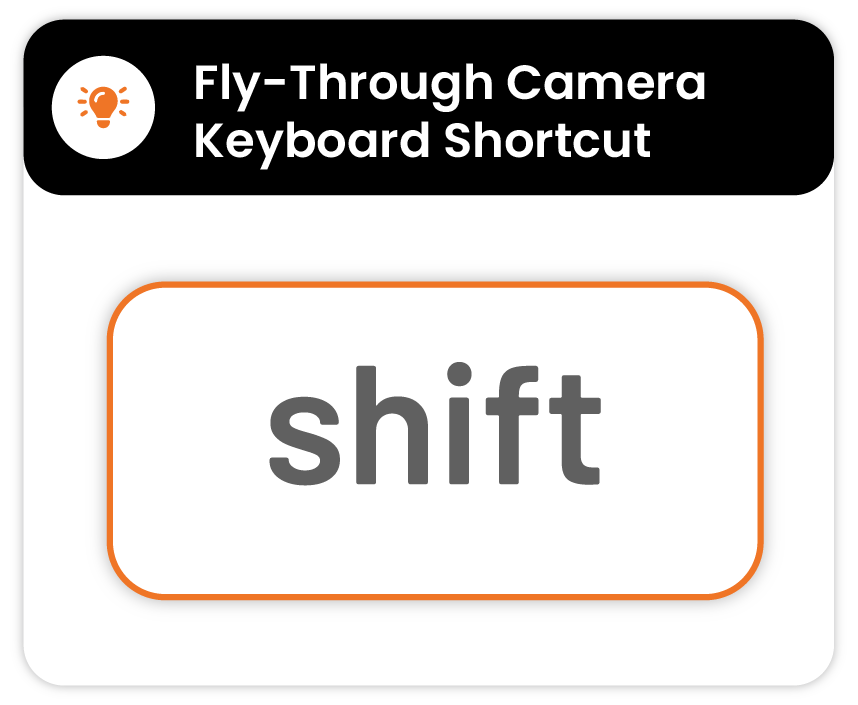
Press the left shift key to speed up the camera while moving.
Why use WASD keys instead of the arrow keys?
The WASD movement keys are commonly used in design software for object manipulation and have become a standard control scheme.
The reason they are considered more efficient than other key arrangements is because they allow your left hand to easily control movement in all four cardinal directions (W = up, A = left, S = down, D = right), while the right hand is free to control other actions such as adjusting the size or orientation of the object.
The keys are also positioned in a way that allows for quick and intuitive access, allowing you to move and manipulate objects smoothly and fluidly.
If you're not too familiar with the WASD movement keys in design software, it may take some time to get used to, but once you do, it will make you much quicker at designing your tiny home.